SDD (Spec Driven Development) - from a vague request to verified behavior
This Learning teaches the engineering loop behind spec-driven development: turn intent into observable requirements, plan one change, implement it, and compare the result with the accepted contract. You will add JSON output to a tiny existing command-line tool while preserving its current behavior, working with a coding agent and one of five frameworks.
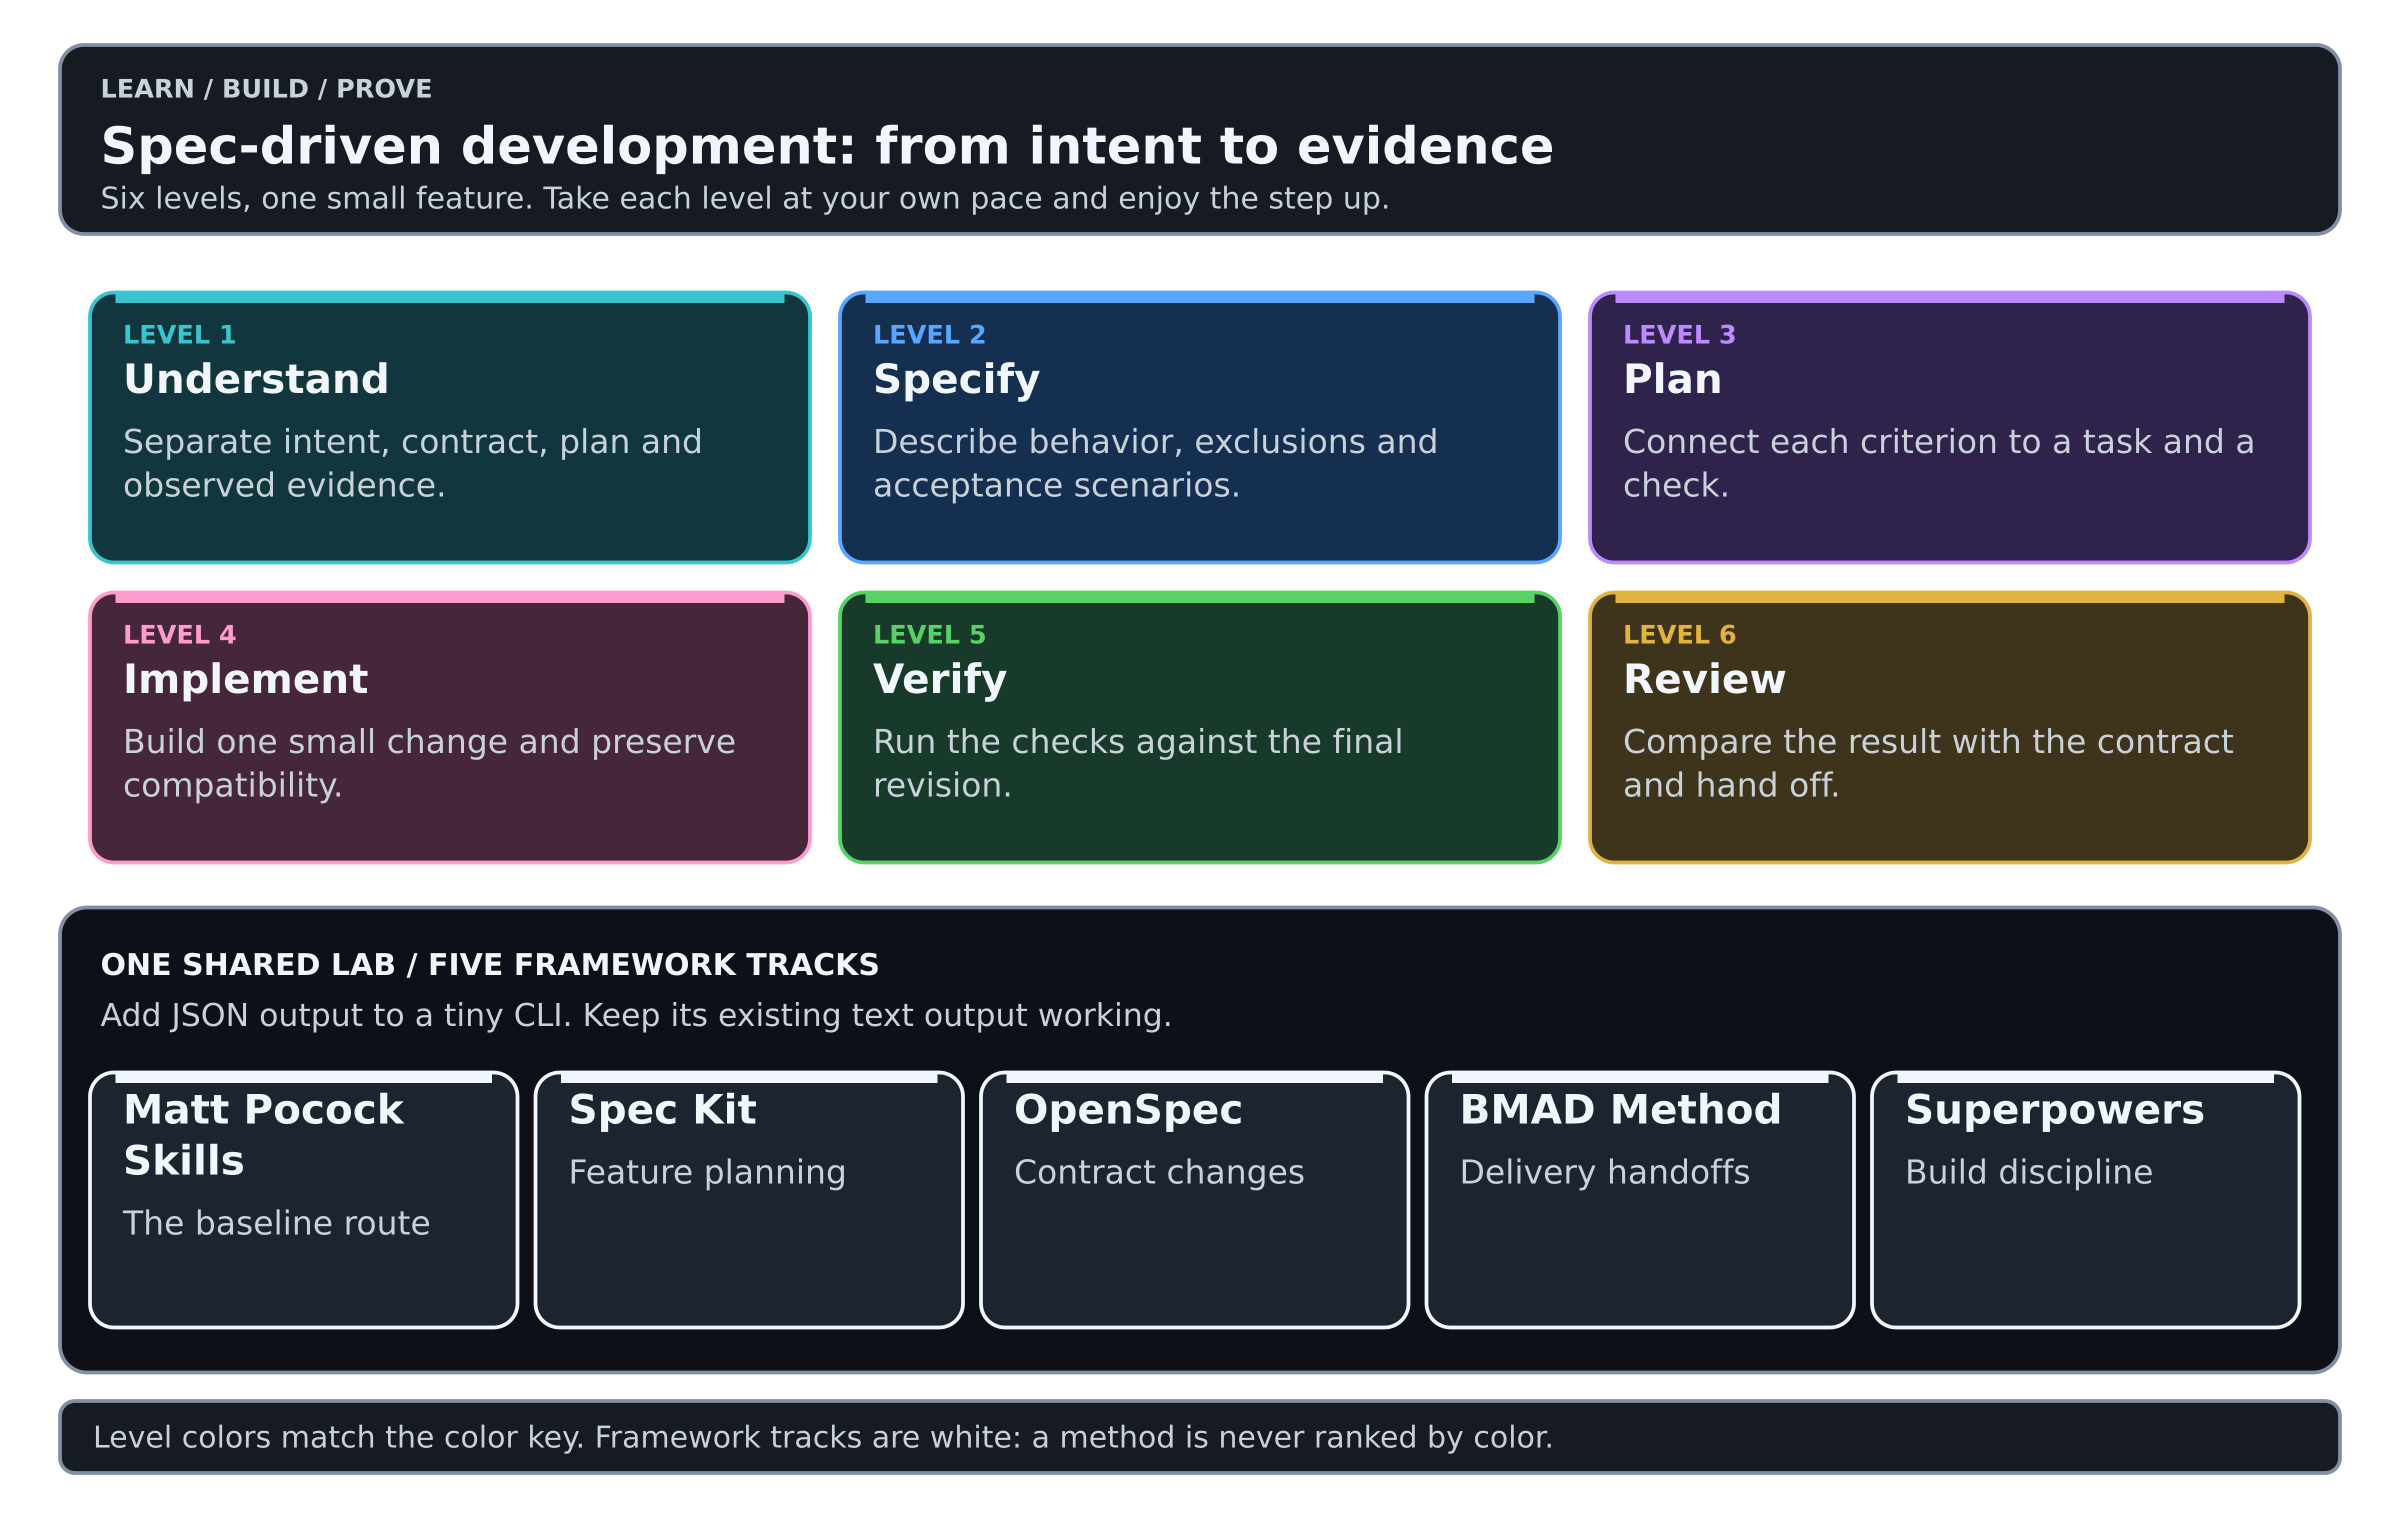
The levels
Each level ends with a small check. There is no time limit: when you can do what the check asks, go on to the next level. Take a break between levels, repeat one, or do the whole Learning in one sitting.
| Level | You practice | You have passed the level when |
|---|---|---|
| 1 · Understand | Telling request, contract, plan and evidence apart | You can say what each of the four proves |
| 2 · Specify | Writing behavior, exclusions and scenarios | A partner can predict the output from your contract alone |
| 3 · Plan | Mapping the contract to tasks and checks | Every criterion you care about points to a task and a check |
| 4 · Implement | Building one bounded change with test feedback | JSON output works and the old tests still pass |
| 5 · Verify | Running the checks on the final code | Your evidence comes from the final revision and gaps are visible |
| 6 · Review | Comparing the diff with the contract and handing off | Someone else could continue from your handoff |
Level 1 is the Foundations. Levels 2 to 6 are the Lab, which you walk on a lab route: the steps for one framework.
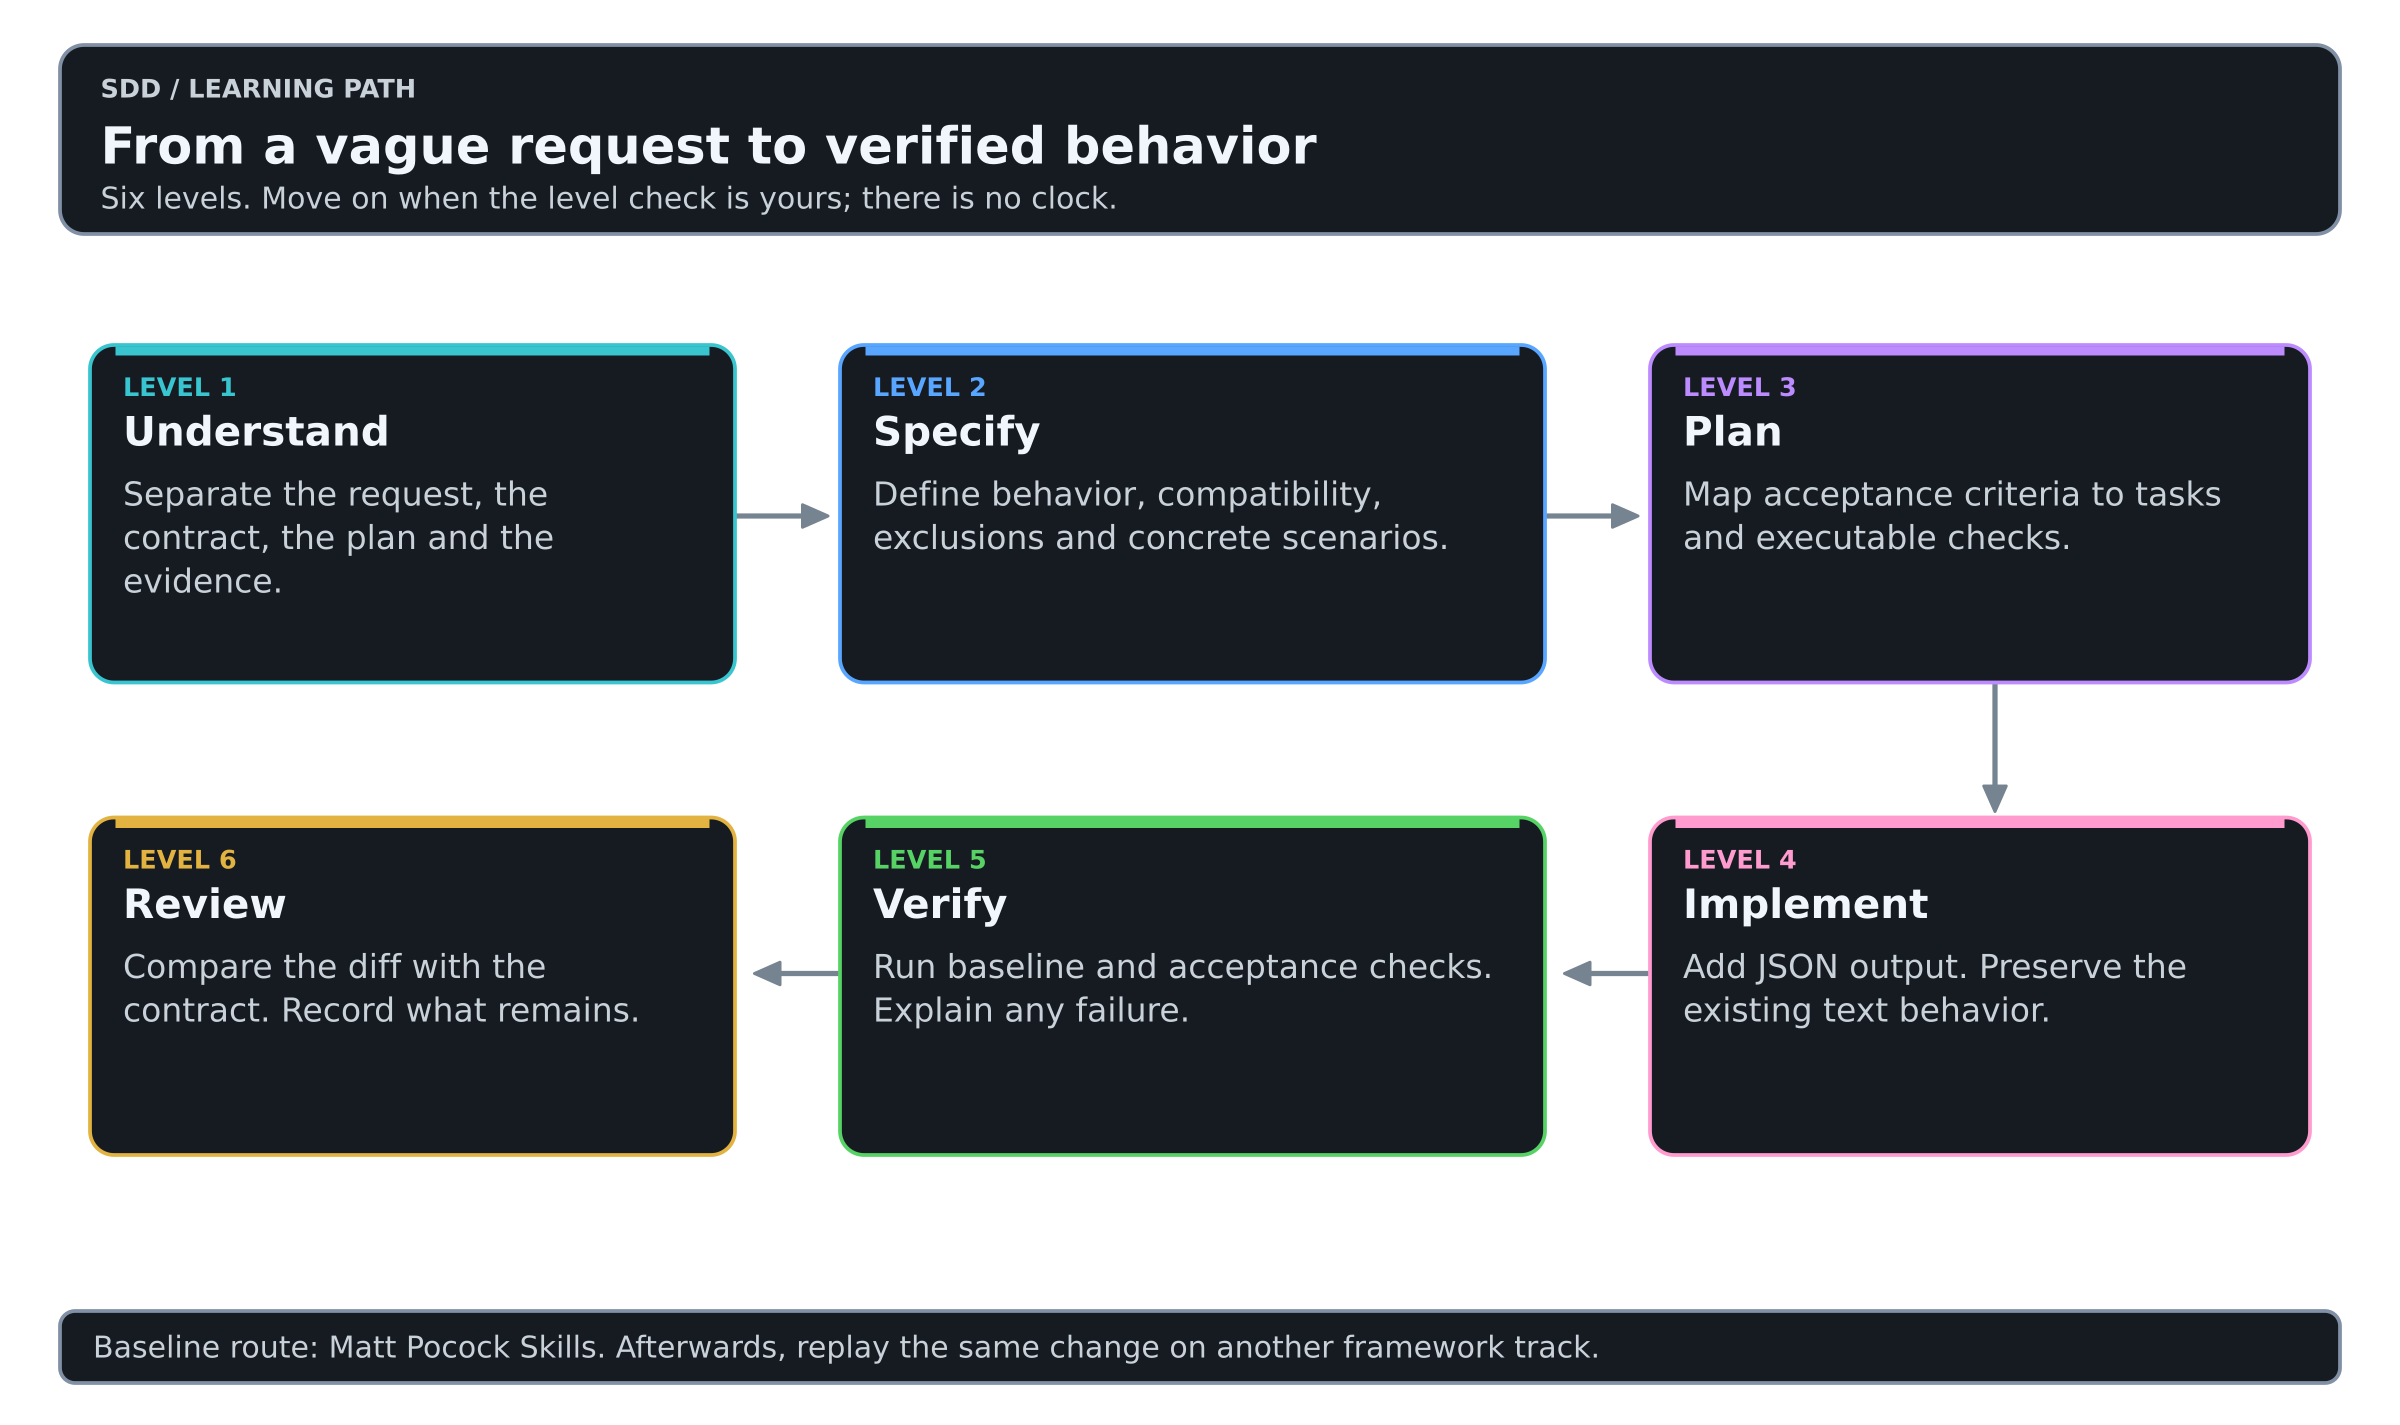
The articles
Read them in this order. Articles 1 to 4 are the Learning itself, with Matt Pocock Skills as the baseline route. Articles 5 to 12 are the other four framework tracks; take the ones you are curious about. Articles 13 and 14 put the five side by side.
| # | Article | What it is |
|---|---|---|
| 1 | Foundations | Level 1: request, contract, plan, evidence, and how to read the diagrams |
| 2 | Lab | Levels 2 to 6: the contract, what each level asks, its check, and the choice of route |
| 3 | Matt Pocock Skills: Quick & Dirty Starter Guide | Baseline track: the tool |
| 4 | Matt Pocock Skills: Lab Route | Baseline track: levels 2 to 6, the run every other route is compared with |
| 5 | Spec Kit: Quick & Dirty Starter Guide | Track: the tool |
| 6 | Spec Kit: Lab Route | Track: levels 2 to 6 |
| 7 | OpenSpec: Quick & Dirty Starter Guide | Track: the tool |
| 8 | OpenSpec: Lab Route | Track: levels 2 to 6 |
| 9 | BMAD Method: Quick & Dirty Starter Guide | Track: the tool |
| 10 | BMAD Method: Lab Route | Track: levels 2 to 6 |
| 11 | Superpowers: Quick & Dirty Starter Guide | Track: the tool |
| 12 | Superpowers: Lab Route | Track: levels 2 to 6 |
| 13 | Visual Knowledge Map | The five frameworks above the loop they share |
| 14 | Framework Comparison | Choosing a track by the problem you have, and comparing runs fairly |
| 15 | Trainer Guide | For people guiding others through the levels |
The baseline and the other routes
Every framework track is two articles: a starter guide that explains the tool, and a lab route that walks levels 2 to 6 with it. The five lab routes share the levels, the contract and the checks; the steps differ.
Start with Matt Pocock Skills. That first run is your baseline: when you later replay the same change on another route, you have a run of your own to compare it with. You do not need to install every framework to complete the Learning.
What you will be able to do
- Separate a requirement from a technical implementation choice.
- Write acceptance scenarios that another person can check.
- Preserve existing behavior while adding a feature.
- Link an important requirement to a task, a test and an observed result.
- Explain the difference between specification validation, application testing and human acceptance.
- Hand the next session artifacts it can continue from.
Read the colors
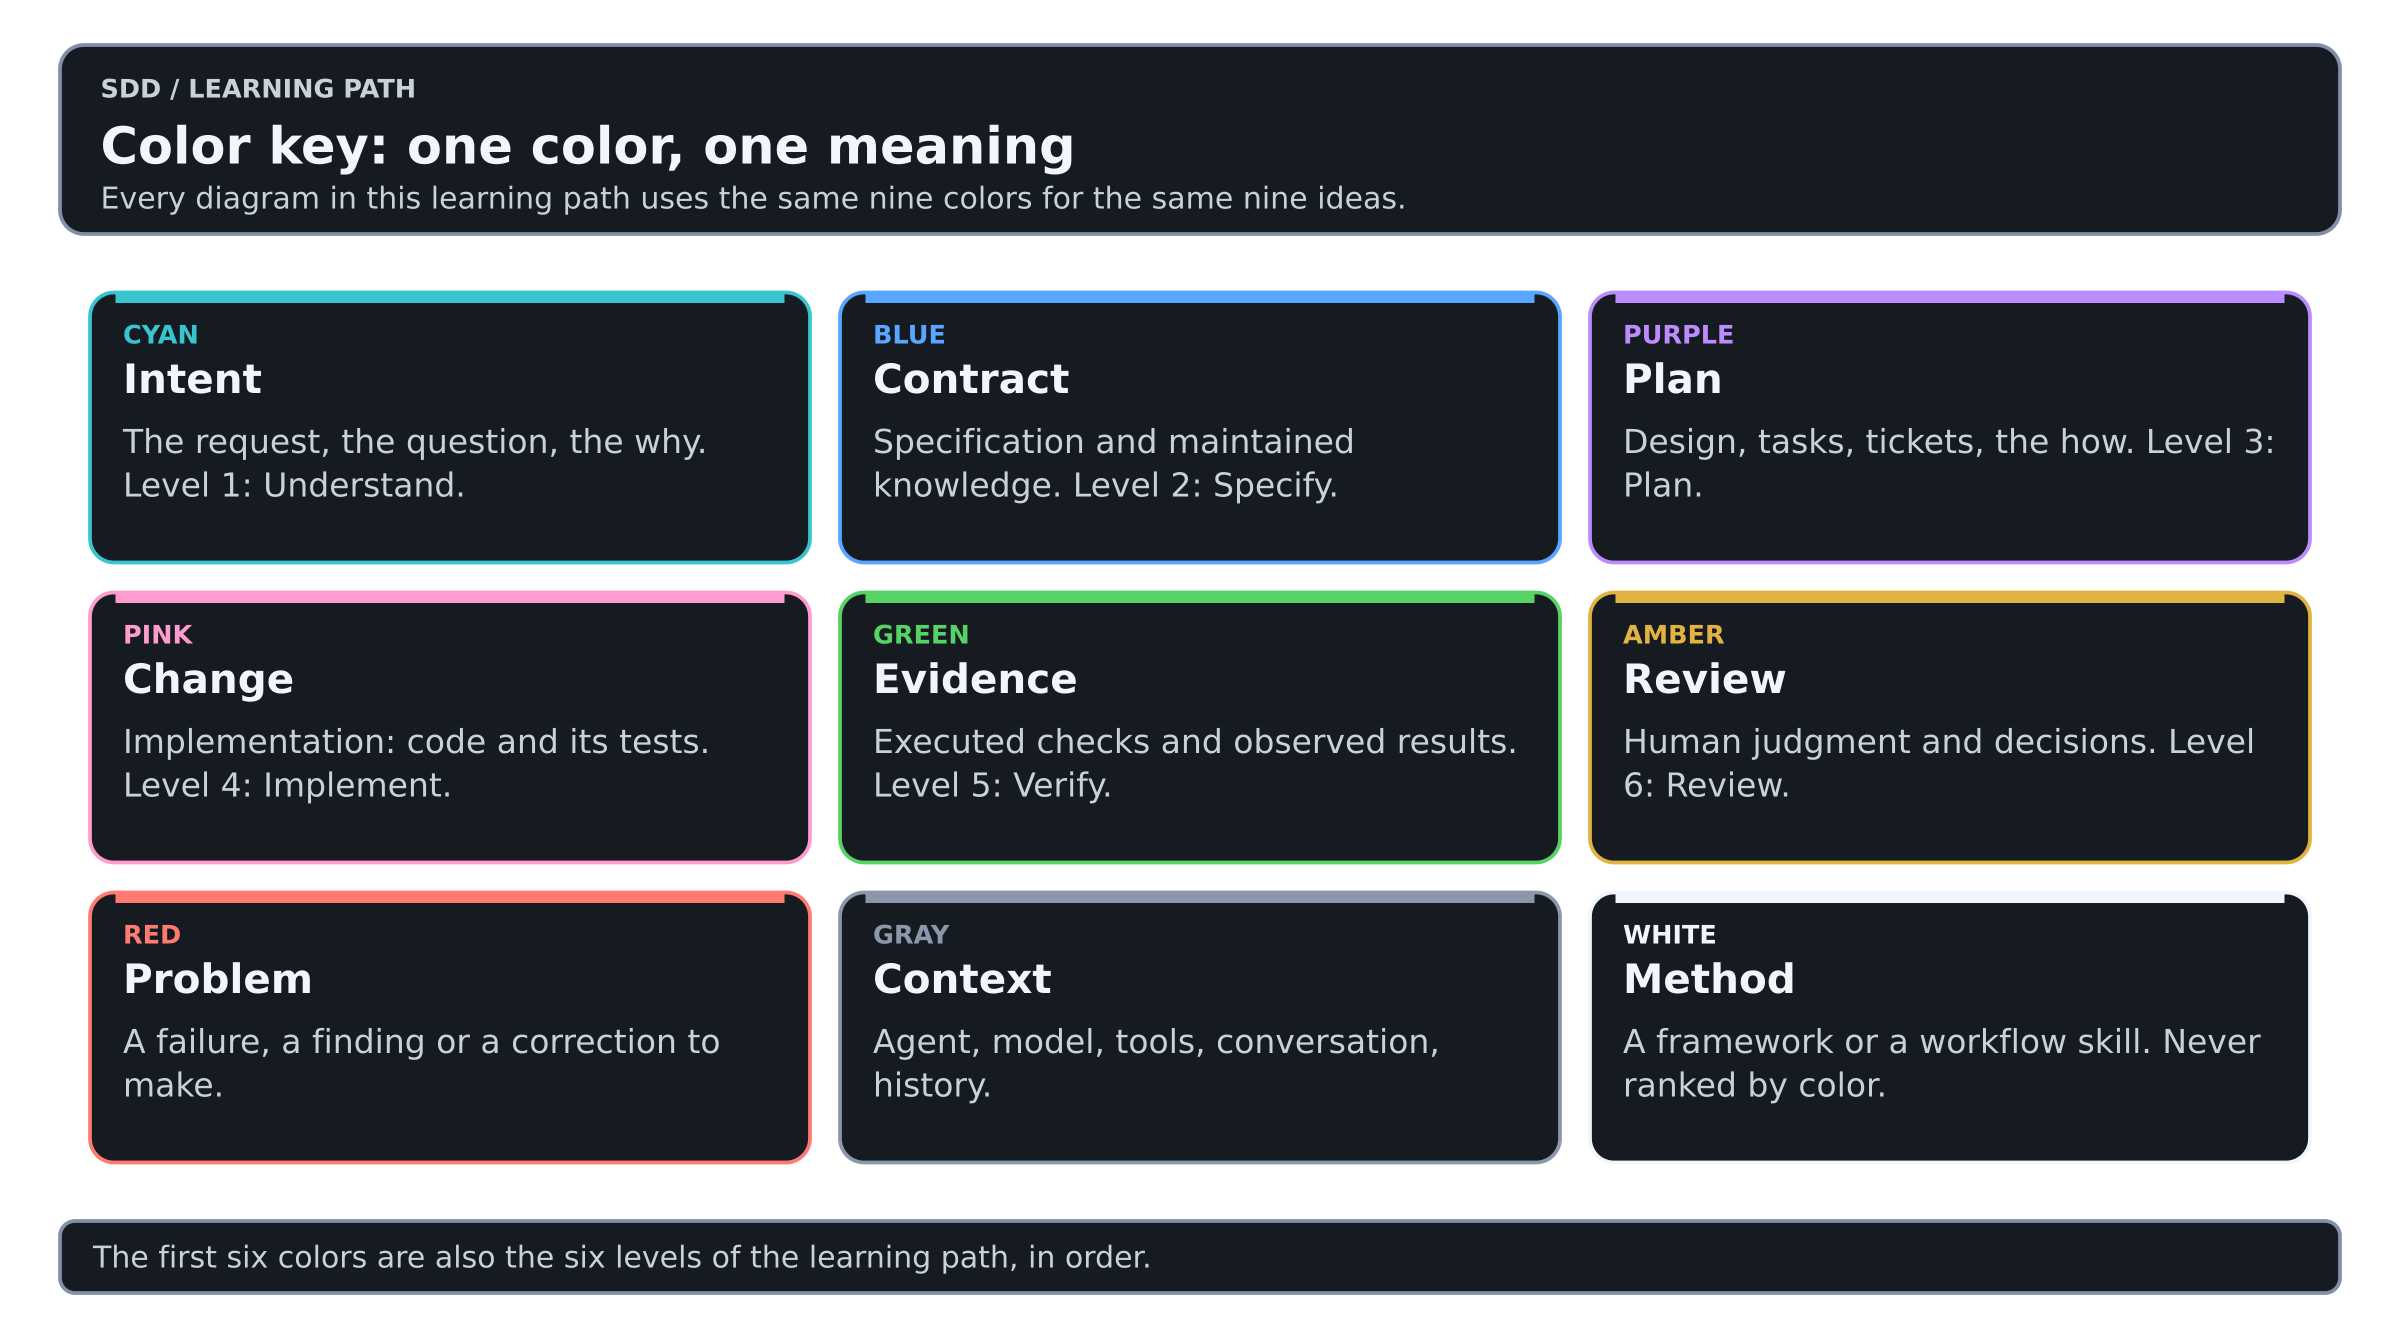
One color means one thing in every diagram of this Learning, so a picture you meet in a later article reads like the ones you already know.
| Color | Meaning | Level |
|---|---|---|
| Cyan | Intent: the request, the question, the why | 1 · Understand |
| Blue | Contract: the specification and maintained knowledge | 2 · Specify |
| Purple | Plan: design, tasks and tickets | 3 · Plan |
| Pink | Change: the implementation, code and its tests | 4 · Implement |
| Green | Evidence: executed checks and observed results | 5 · Verify |
| Amber | Review: human judgment and decisions | 6 · Review |
| Red | Problem: a failure, a finding or a correction to make | Any level |
| Gray | Context: agent, model, tools, conversation, history | Around the levels |
| White | Method: a framework or a workflow skill | The tracks |
Frameworks are white, so that no color ranks one method above another.
Set up once
Use Linux, macOS or WSL with Python 3.11 or newer. Install and configure your coding agent, its model access and the chosen framework before you start level 2. Framework setup can require network access; the Python exercise itself does not. Use synthetic documents only.
Download and unpack the starter lab. Open its doc-index-starter directory and run:
$ python3 -m unittest discover -v
$ python3 doc_index.py sample-docs
The four baseline tests should pass. The CLI currently prints two tab-separated filename/title rows. It does not support JSON yet; adding it is the exercise. Keep a clean copy of this starting directory for every route you walk. Two people can share one working agent session.
The idea to remember
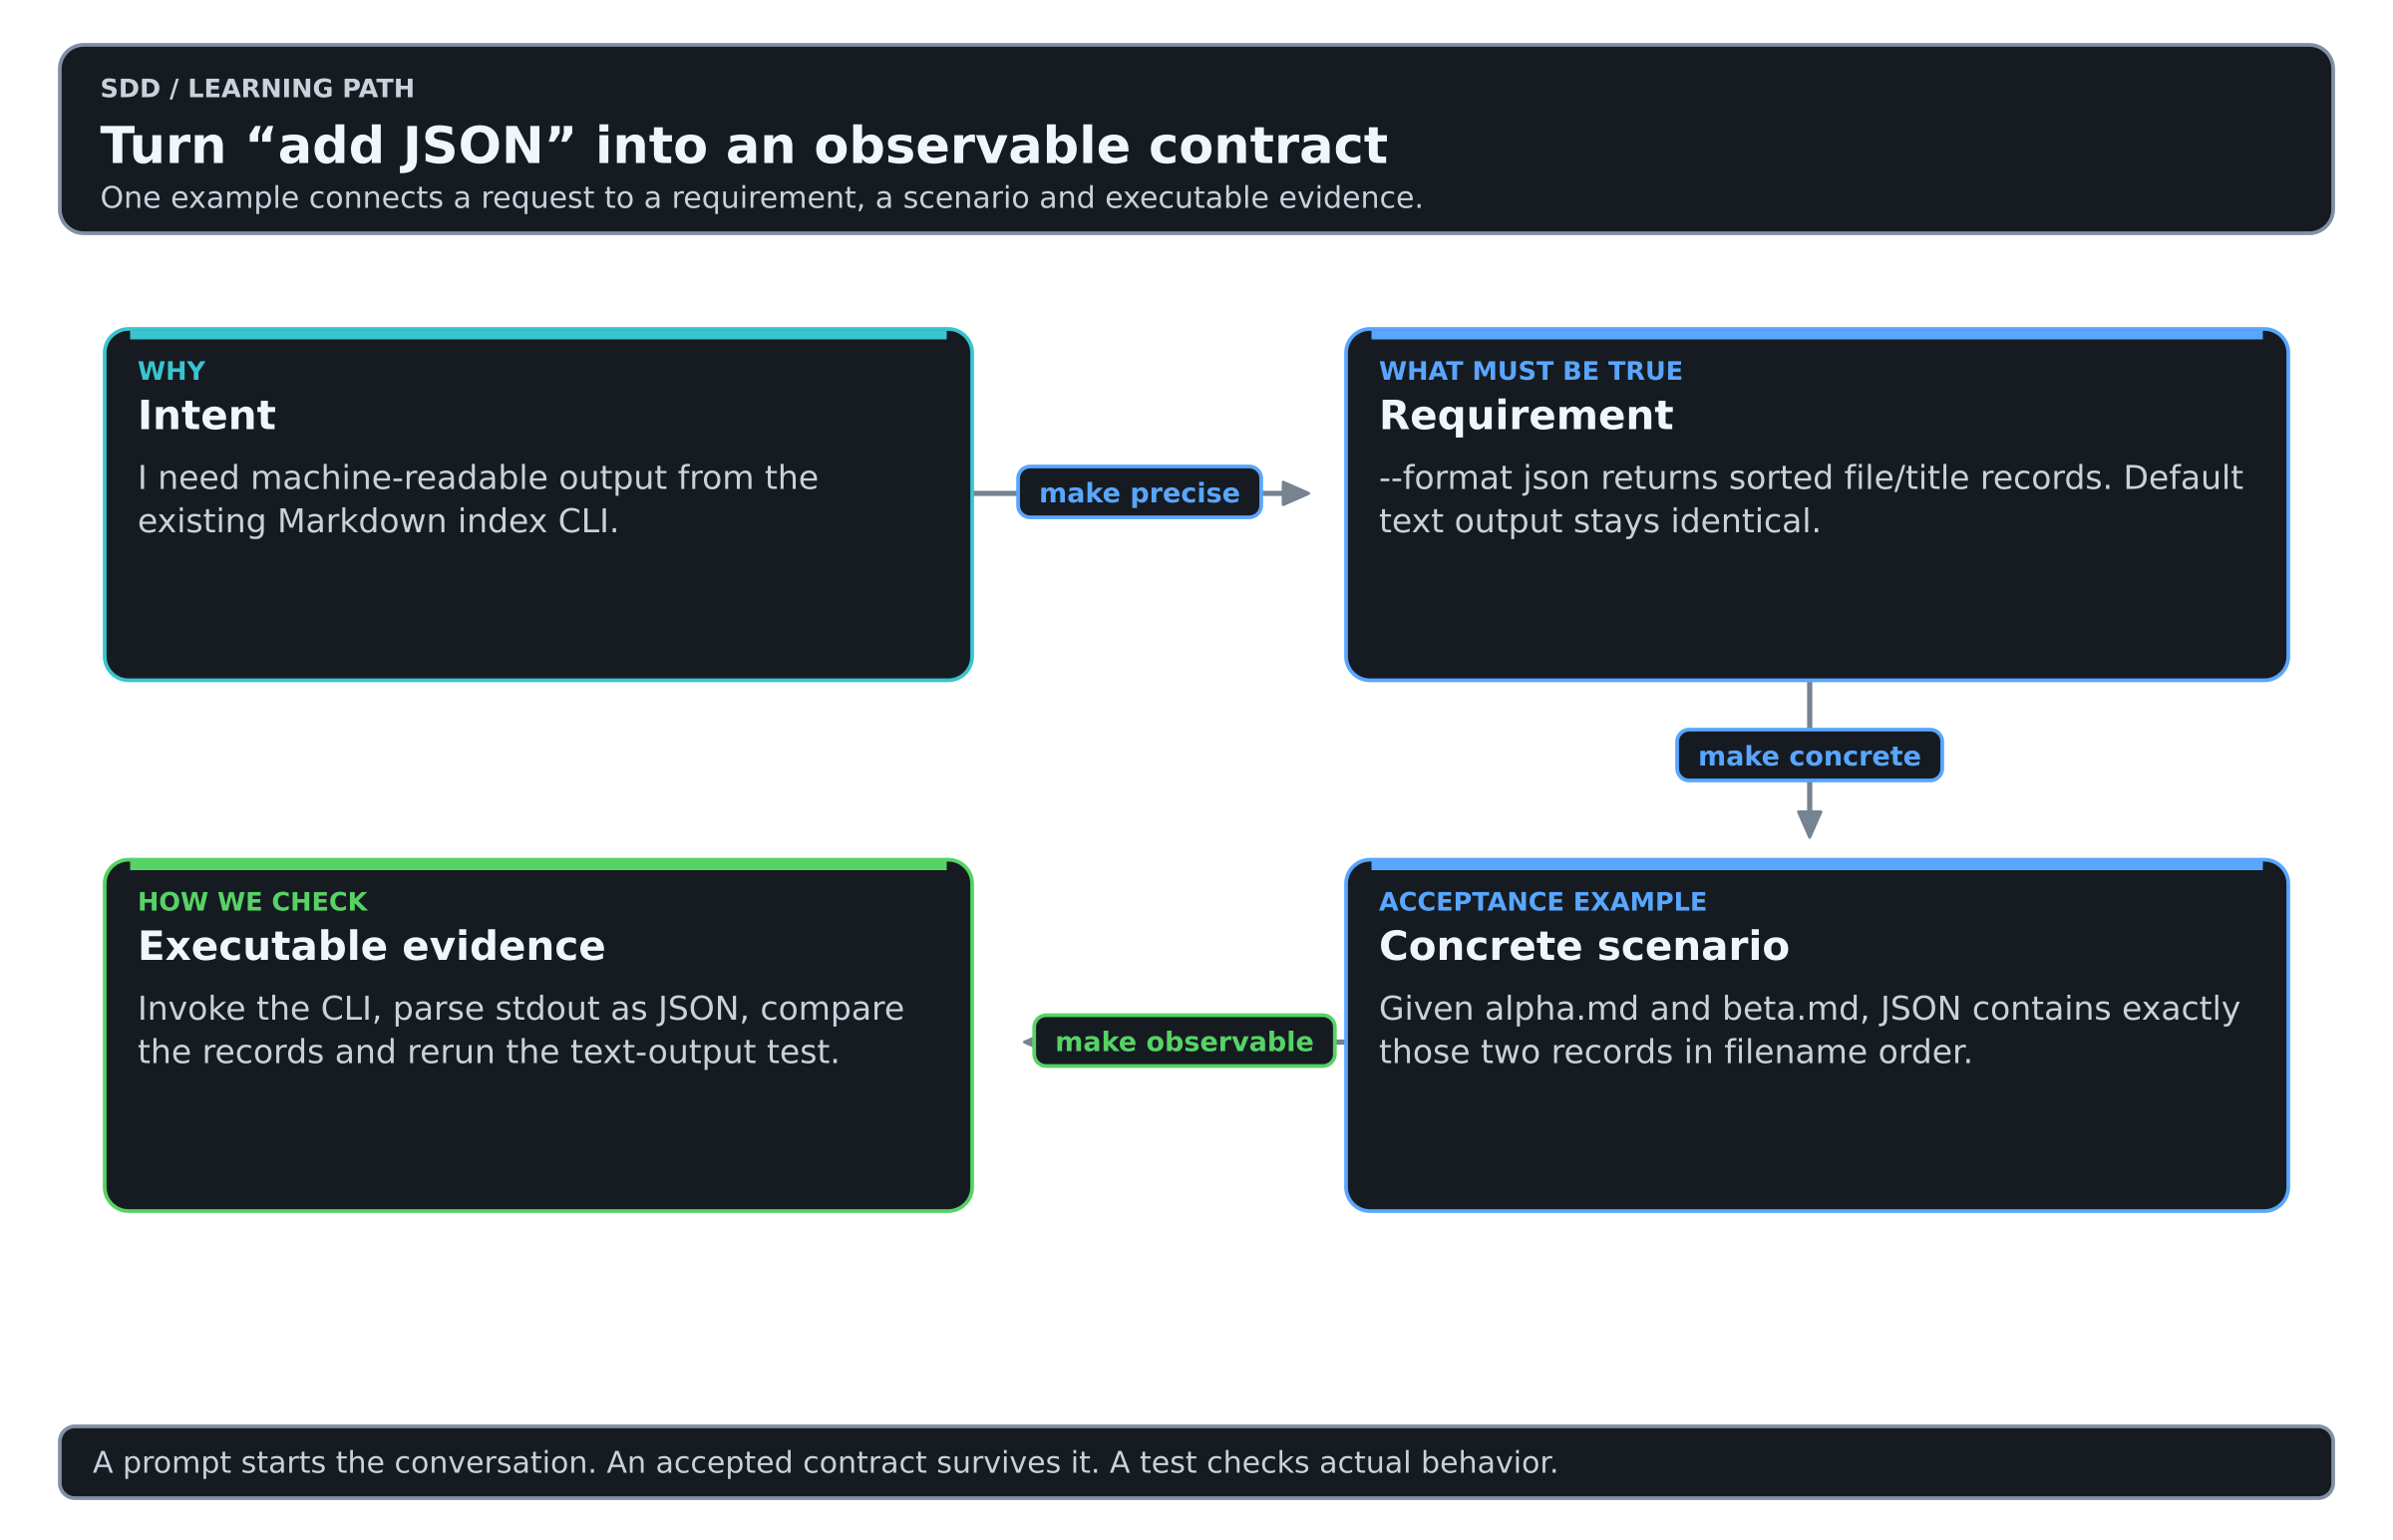
“Add JSON” is an opening request. “Produce a sorted array of file/title objects and leave default text output unchanged” is a testable contract. An observed test result tells you whether the implementation satisfies the part of that contract the test covers.
Downloads
| Resource | Use |
|---|---|
| Starter lab ZIP | Working baseline, synthetic samples, tests and a learner worksheet |
| Trainer kit ZIP | Facilitation notes, acceptance checker and a clearly separated reference solution |
| Diagram pack ZIP | Twenty-six diagrams as PNG and SVG for slides, handouts and teaching, with their source |
| Knowledge map SVG | Scalable overview for projection and zooming |
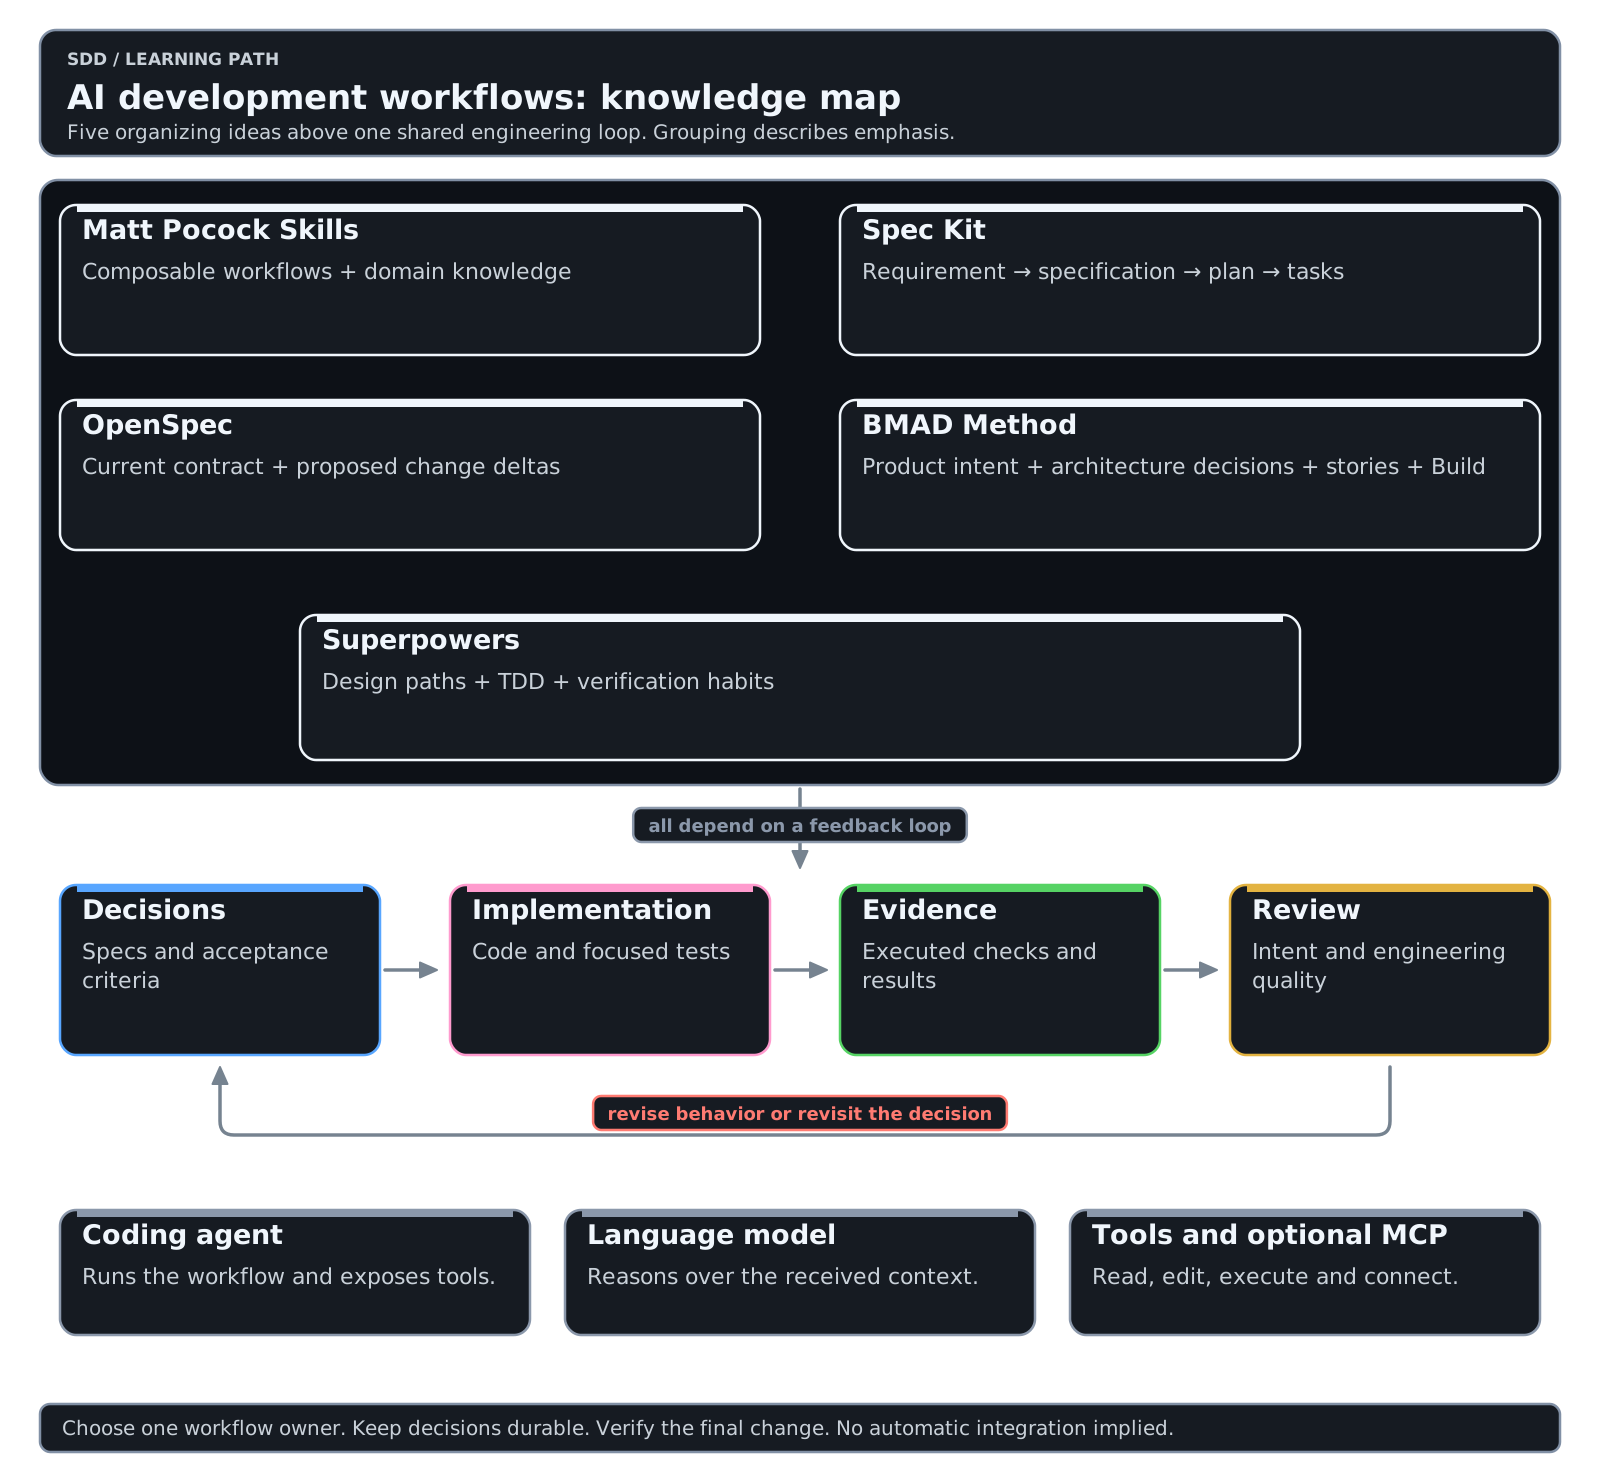
Every diagram has a transparent canvas. The labeled nodes retain their fills so the same images stay readable on light and dark pages.
Final check
Point to one requirement, the task that implemented it, the test that checks it and the result from the final revision. Then say what that test does not prove. That is the skill this Learning teaches, whichever framework you use.